Troubleshooting Screen Printing Part 1
June 23, 2018
In this article recently published by Impressions Magazine, Kieth Stevens gives advice on how to troubleshoot a variety of screen-printing complications.
There are many variables that can affect a print's quality. From the squeegee to the correct cure temperature, every piece of screen-printing equipment used can affect a job's outcome. Think of the equipment as tools,: when used correctly, the outcome will be positive.
First, it's important to maintain a clean and organized facility when screen printing. You may not think it has any effect on your prints' outcome, but it does. You can tell if a shop meets this standard just by its appearance - from the reception area to the back door. If the employees care about the plants in front of the building, then they care about the boxes of finished garments being shipped.
Following are some troubleshooting tips that can help solve printing issues.:
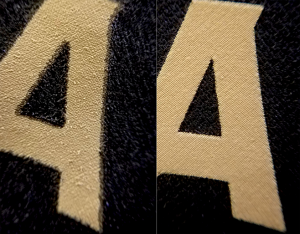
Blurry Prints, Uneven Edges
Off-Contact Issues: Insufficient off-contact can leave marks on the print - such as the mesh imprint - or cause the image to be blurry. The larger the image being printed, the more pronounced the blur can become if off-contact is not set properly. Also, the lower the screen mesh's tension, the more off-contact will be needed to get the screen to peel off the substrate, which can add to the blurriness.
Screen Tension: If your screens are very loose, get them re-stretched as soon as possible. Your local dealer can help you with this. In the meantime, order a few new screens of your favorite mesh counts. Simply put, printing is much easier with tight screens.
Registration and off-contact magically become less of a problem as well. Just be sure that all the screens being used for a particular have the same - or similar - tension values. For example, if a five-color job's registration is off, check to see if all the screens are in the same tension range. If one is lower than the others, it is probably that screen that's causing the registration issue.
Shirts Moving on Pallet During Printing: It can be frustrating when a shirt shifts as the pallets move between screens when you're in the middle of printing a design. It may mean you have to start a job again from the beginning.
Research the adhesives that are offered by industry suppliers. Some are sprayed or squeezed out of a bottle, while others come in a bucket and can be spread onto the pallet. Do some homework early in your garment-decorating career to find the right type for your shop.
Most water-based adhesives are less affected by the flash unit's heat than the aerosol ones - even those that claim to be specially made to withstand heat.
Ink-Deposit Issues
Squeegees: These commonly overlooked tools can greatly impact print quality. If you are printing on a manual press, remember to properly flood the screen before each print. The flooding action pushes the ink into the area that is to be printed and does half the work. When you actually print, you should only be applying the ink onto the shirt.
If you don’t flood the screen before each print, then you would have to add pressure on your print stroke, which could force the ink into the fabric, thus wasting energy, ink and profits. Every automatic screen-printing machine floods the screen each time before the squeegee prints.
Additionally, maintain a sharp squeegee edge. This helps to shear or cut off the ink, allowing it to more easily release from the screen. If the edge is worn or rounded, it makes it harder for the ink to clear the screen and can make the print feel rougher. Replace any squeegee blade that has nicks.
Keep an assortment of squeegee durometers in your shop. If you need more ink deposit on a print that lacks good coverage, switching to a softer squeegee is a quick option. Otherwise, double-printing a color may be necessary, thus slowing production and costing more money.
Similarly, if less ink deposit is needed, switch to a harder squeegee. Also, adjusting the squeegee angle can add or reduce the amount of ink being applied. For example, angling the squeegee toward the direction of the print stroke adds more ink deposit. And always be consistent with pressure so that troubleshooting will be easier when a print goes awry.
Emulsion Stencil: Another underappreciated part of the printing process is emulsion quality. Emulsion over mesh (EOM) is the emulsion thickness of the coated screen vs. the uncoated screen. It’s important to have a thicker emulsion deposit on the bottom of the screen’s shirt side. When using finer mesh counts, less emulsion typically is applied, but it is important to have more emulsion applied on the bottom of the screen with lower mesh counts.
This is crucial because extra emulsion acts like a gasket to hold back the ink that is being squeezed through the screen under pressure. Otherwise, the ink can go anywhere, even under the gaps of the screen weave. The resulting print can have ragged or uneven edges due to ink gain. Having a suitably thick emulsion stencil also helps eliminate mesh marks while increasing opacity.
What about the finer meshes? If there is not enough emulsion on the bottom of the screen when printing halftones and fine detail, the halftone dots may be distorted, appearing in the shape of stars.
Ink Going Through the Shirt: If you see ink being squeezed through to the inside of a shirt, then there is too much pressure being applied to that screen. Perhaps the ink is too thin, the squeegee is too hard, too much pressure is applied or the substrate fabric’s weave is too open.
Always test squeegee pressure by lowering it to where it almost won’t print, then add just enough to where it prints just right — with visible details and even coverage — and then stop. Look at the garment’s underside and you should see much less ink.
Click here for Part 2 of the article...
