This is the second half of an article recently published by Impressions Magazine, in which Kieth Stevens gives us advice on how to solve a variety of screen-printing issues. Click here to read Part 1.
Ink Drying in Screens
Over-Flashing: Printers often refer to ink “drying in screen” when it becomes hard and clogs the screen mesh’s open parts. This usually is caused by using excessive heat during printing, most likely after the flashing process. If the ink isn’t given enough time to cool after flashing, laying the screen down on top of the heated print could partly cure the ink it contains, thus clogging the mesh.
Using proper off-contact also can help keep the ink in the screen from overheating. This ensures the screen peels away from the print as the squeegee passes over, thus minimizing contact with the heated print.
Inks Cracking, Washing Off
The Cure: Let’s be clear: Heat is your enemy and friend in the screen-printing process. Using too much and too little can harm your print. The average, industry-agreed-upon curing temperature and time is 320˚F for one minute. This is a guideline, and doesn’t mean you can’t cure a four-color (halftone) process design at 360˚F for 45 seconds.
The thicker the ink deposit, the longer it will take to cure. Some special inks can cure at lower temperatures, though printers must use caution when working with them.
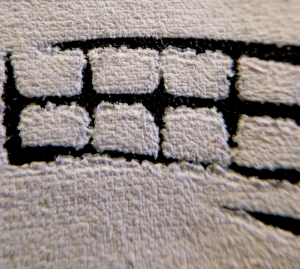
How can you be assured ink has cured sufficiently? The general rule is to stretch the print after it has come off the dryer and cooled. If the print cracks, it’s not cured. Be careful not to stretch a print until it cracks. Rather, take a 1-inch-wide print and stretch it to 2 inches at most to see if it cracks. To make doubly certain that all the ink has cured, wash the garment.
Undercured Prints: Curing, or lack thereof, probably is the primary culprit of all the complaint calls I receive about inks. To avoid undercuring issues, ensure the entire ink layer is cured at the prescribed temperature. Time is your friend when it comes to curing. A steady run of about one minute through the dryer at the correct temperature will save you a big headache.
A White Print Becomes Color
Dye Migration: Dye migration typically only occurs on polyester or polyester-blended garments. When the polyester fabric is dyed, it is “set,” cured or dried between 280˚F and 300˚F. Therefore, when a screen printer cures inks at 320˚F — a higher temperature than the polyester dye’s cure temperature — those dyes get released.
Dye migration can happen when dryer settings aren’t reset from a previous job involving cotton shirts, which can involve temperatures between 330˚F and 340˚F. The white ink in a design can turn pink on red fabric or gray on dark fabric, or perhaps other colors due to excessive dyeing. Sublimated camouflage fabrics are prone to heavy dye migration, making them some of the worst fabrics for printing, so be cautious.
To avoid dye migration, use a low-bleed, low-cure underbase ink or a low-cure additive. When printing on fabrics known to bleed, try a special gray or black blocking ink specifically formulated to absorb the dye. Gray or black blockers need to be overprinted with white if other colors will be printed on top.
If you take care of your screen-printing tools and are consistent in your methods for coating screens, and checking mesh tension and dryer temperature, etc., your prints will look better and troubleshooting issues will be much easier.
Go to Part 1