This article by Kieth Stevens was recently published in Impressions Magazine. Use these tips and tools to create dynamic designs that customers can’t resist.
If one of your customers wants to add a new treatment to a logo, offering special-effects (SFX) prints can help elevate your shop. Don’t let failed past attempts deter you from using this popular technique. Here are a few tips on how you can successfully master special-effects prints.
As with everything in screen printing, or any other project, preparation is key. I like to emphasize what my dad always says about his wood-working gadgets: “Each item in your arsenal is a ‘tool.’” For screen printers, this includes the film, mesh, squeegees, emulsion and so on. Yes, the ink certainly is an important component, but the tools ultimately make the resulting print.
Art and Film Prep
Let’s start with artwork. If you’re planning on printing with special-effects ink, such as puff, high-density (HD) or glitter, avoid art that includes fine lines, points, little dots, etc. If you’d still like to add special effects to detailed art, just be aware that many of the fine lines may be lost. Most specialty inks will gain size once applied, so either choose larger sections that are simple in shape or add extra spacing in your separations.
Certain special-effects inks can be used for halftone prints (glow-in-the-dark or certain reflective inks) but many inks (puff, HD, glitters, shimmers) are not well suited for small halftone dots. Print quality will be determined by film quality. The better its clarity, the clearer and crisper the resulting image will be on the screen.
As you process the artwork you will lose details, from the computer to film output, to the exposer and during the actual printing process. The amount of detail you lose starts with the film; if it’s correctly opaque and clear, you’re on the right track. If the “clear” portion of the film isn’t crystal clear, then a filtering effect can occur during the exposure, as it would with a milky or more opaque type of film (such as vellum). With clearer film, there’s a smaller chance of underexposure.
Additionally, the black positive area should be as dark and opaque as possible so that all the light exposing the emulsion is filtered or blocked by the film-positive portion, decreasing the chances of overexposure and loss of detail. This is never more important than when exposing thick emulsions.
Remember the following tips about film media options:
1. Vellum is one of the lowest-quality types of film positives. The translucent white is not clear and acts as a filter, while the black print is not very opaque. Vellum is not ideal for transferring detailed art to a screen, but it works well under certain conditions — such as one- or two-color jobs that are not as particularized.
Vellum also can shrink when heated, such as when it goes through a laser printer. Therefore, it’s not recommended for prints requiring exact registrations. When using vellum, you can achieve a darker, more opaque black print by using a spray fixative, which “fuses” the toner particles to make the printed areas appear darker.
2. Inkjet films often work much better than vellum. The black positive portion can become very black and opaque under the correct printer settings, and the screen positive’s film portion can be purchased in a clear version. In addition, these films are readily available and don’t shrink when heated during the printing process.
3. Real Ortho Litho film and printers are the highest-quality option. For four-color jobs and prints where perfect registration is important, consider switching to Ortho film. This process costs more, as it involves more expensive films and chemicals; however, if you’re dealing with detailed artwork and exact registrations, it’s worth it.
Emulsion, Emulsion, Emulsion
Good emulsion coverage will prevent many issues, including lack of ink opacity, and uneven coverage and edges. There is an absolute correlation between the print quality and the tools used.
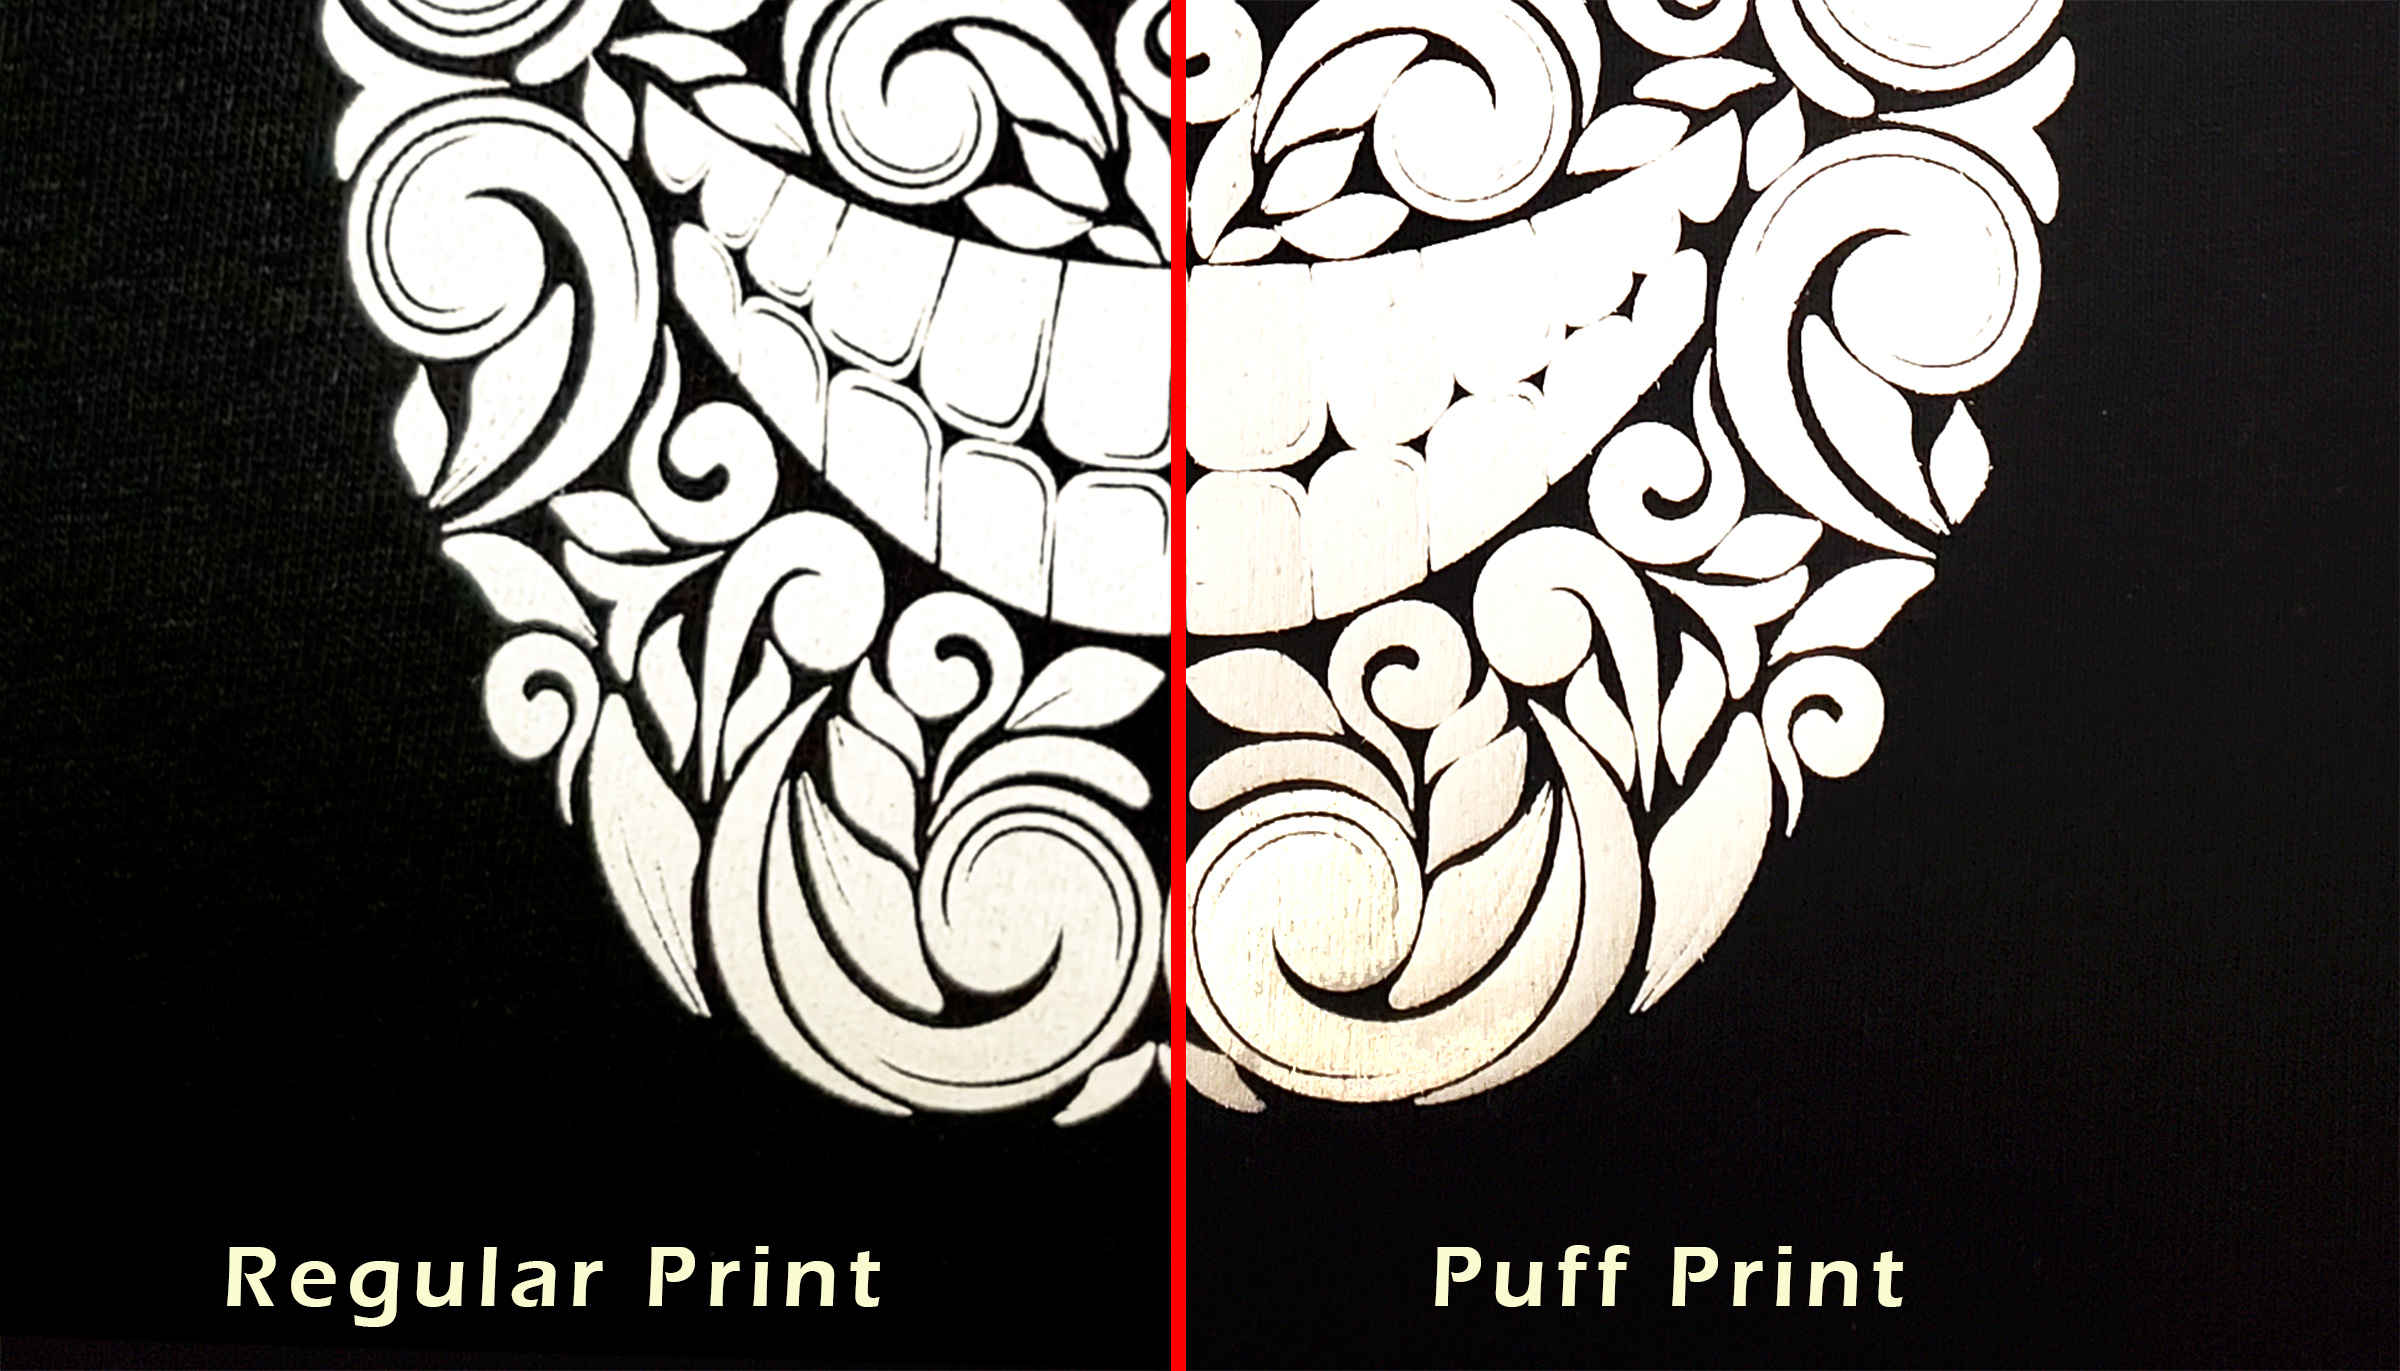
When printing special effects, emulsion is paramount. For example, glitter or shimmer inks also need a thicker deposit due to the metallic flakes they contain. Similarly, when printing a puff or a texturing ink (such as an HD or granite-type ink), a thick ink layer will allow the effect to truly come to life.
A starting measurement for determining whether there is enough emulsion covering the screen is emulsion over mesh (EOM), which measures the emulsion thickness of the coated screen vs. the uncoated screen. A typical average EOM is 20%.
A thicker emulsion coating really counts on the bottom of the screen’s shirt side. When using finer mesh counts, less emulsion typically is applied, but it still is important to have more emulsion applied to the bottom of the screen. Always remember that just as the mesh controls ink flow, it also controls emulsion flow.
When printing HD, gel, or thick granite-type texturing inks, it’s often more convenient to use a capillary film for instant, thick emulsion coverage rather than applying numerous coats. Once you learn how to work with capillary film, you’ll find it easy to apply and it can save valuable time in screen prep.
Squeegee Picks
A simple switch to either a harder or softer squeegee can be the difference between whether the print turns out “OK” or “great.” I’ve heard printers asking suppliers for squeegees and referencing them by color. This makes me cringe because different manufacturers offer different colors for various durometers. One brand’s yellow blade at 60 durometers may be another brand’s 80-durometer blade color. Order squeegees by referencing the durometer hardness to ensure you receive the correct type.
Blade shapes include square, round and V-shaped. Square, or straight-edge, blades are used most often and work well for standard ink applications. I liken this type of blade to a steak knife; it cuts through the ink and the straight edge is good for detail. Round — ball or bull-nose — squeegee blades deposit more ink. Use this type for special-effects inks such as gel or puff. This type of blade is not ideal for detail. Think of it as a butter knife, suitable for depositing a lot more ink onto the fabric.
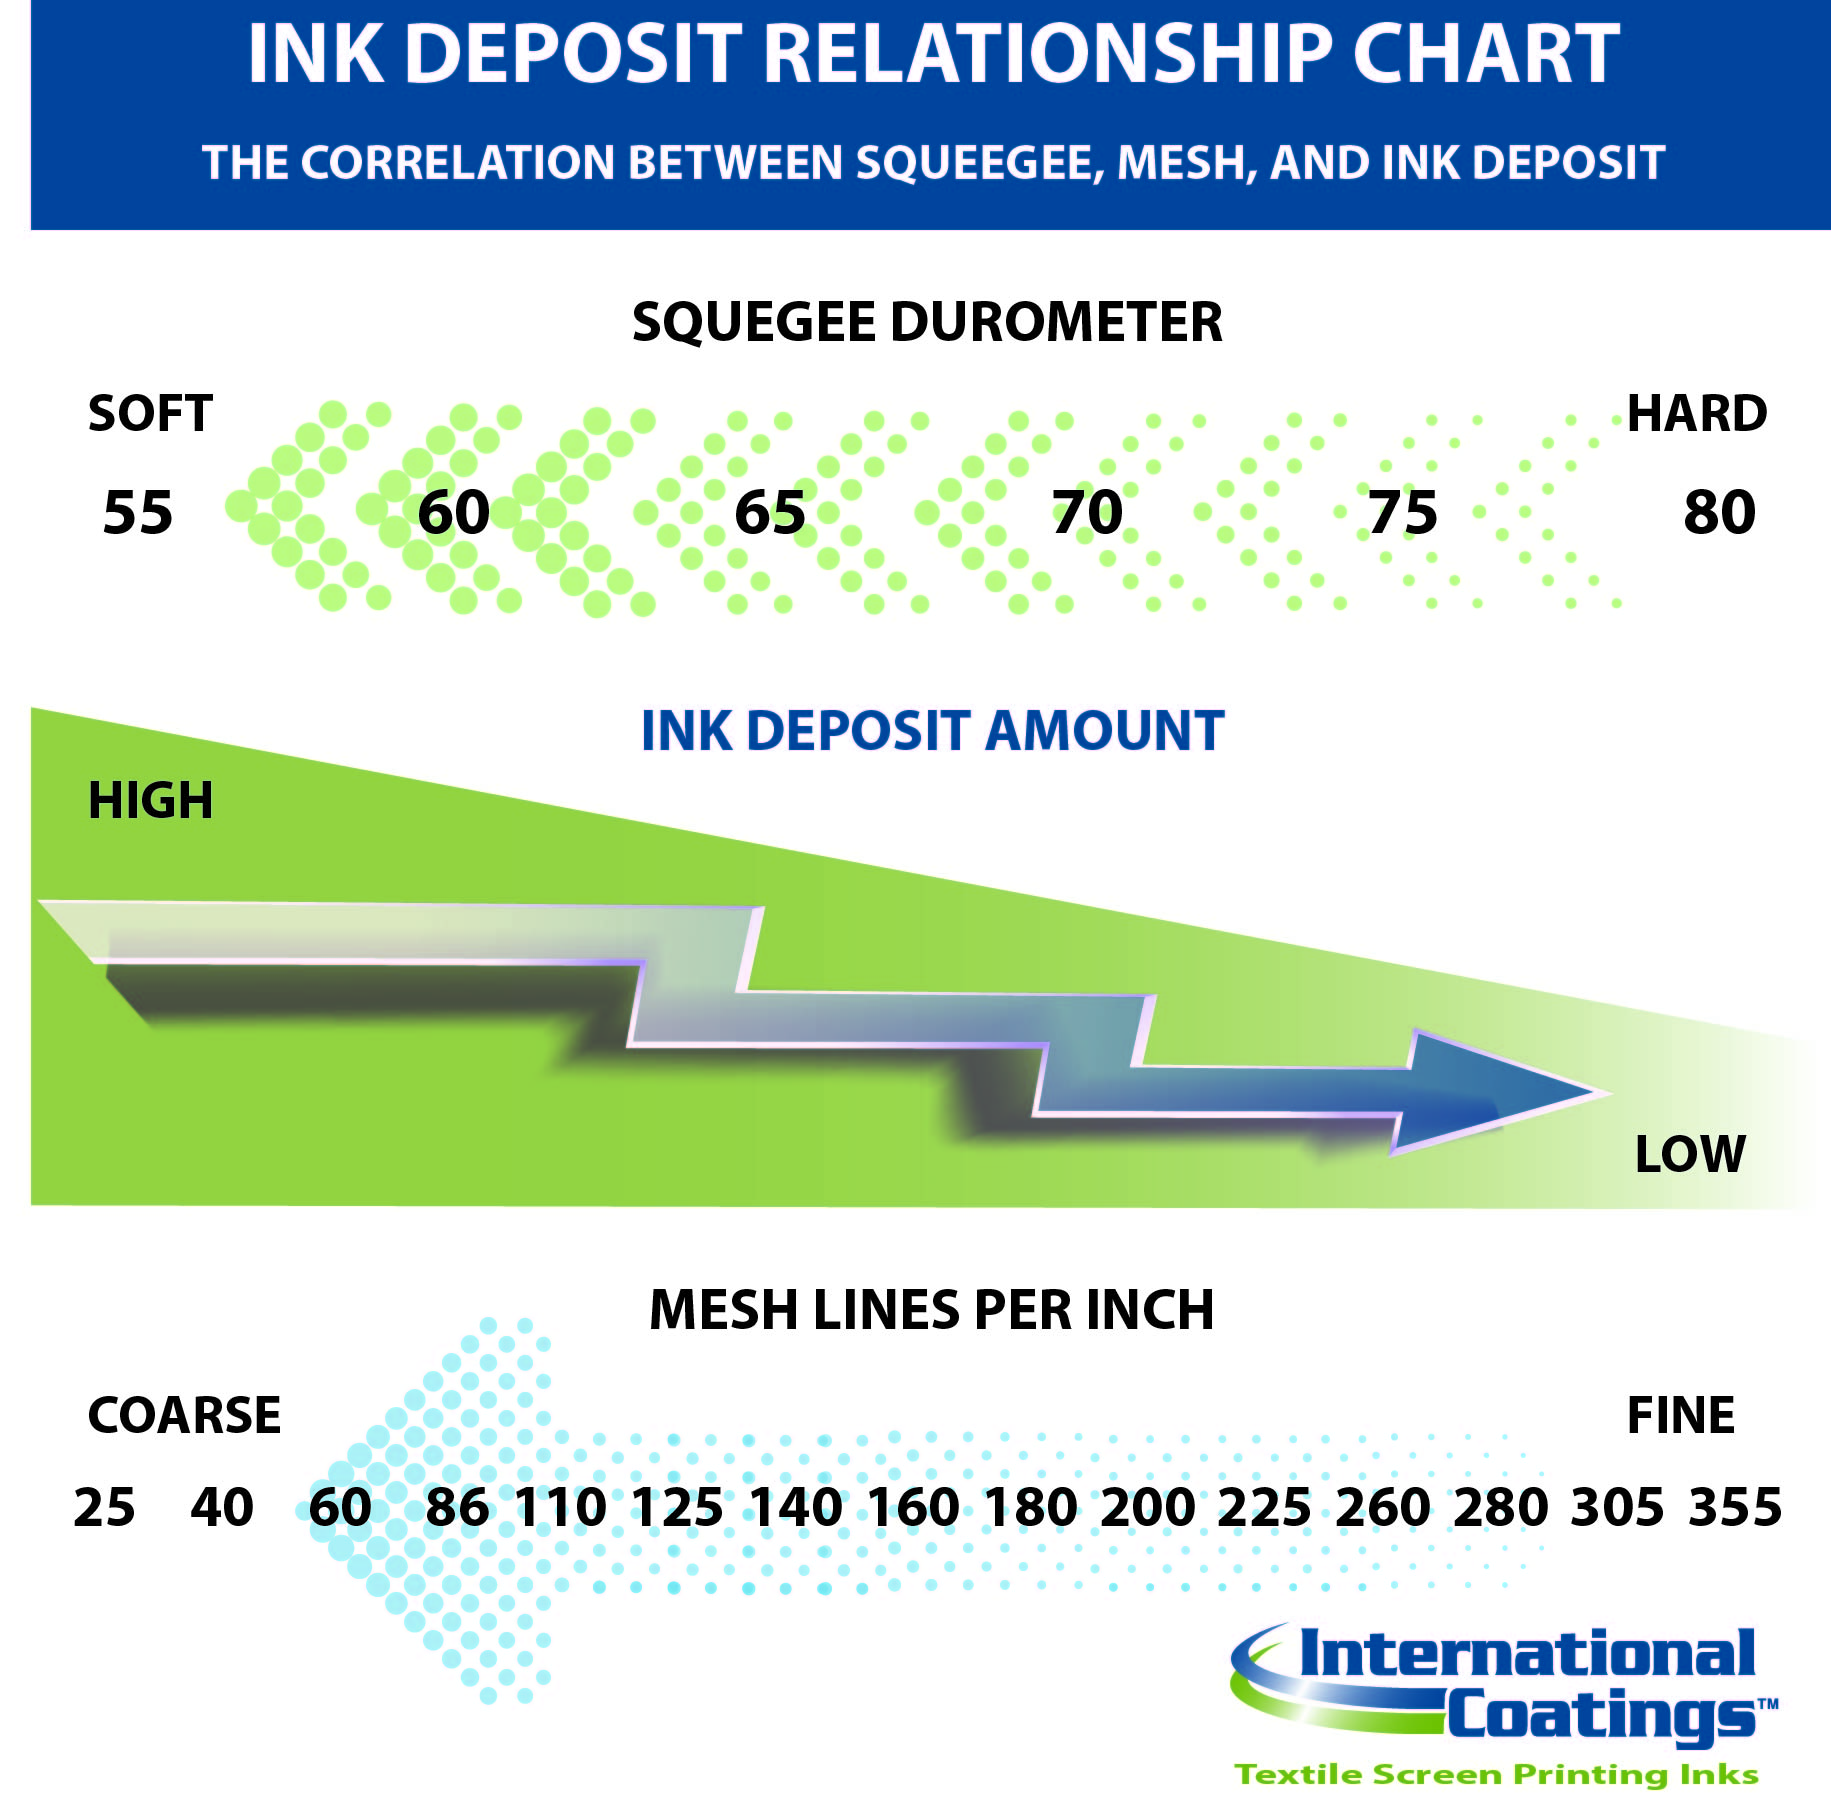
Durometer denotes the squeegee blade’s hardness. A 50- to 60-durometer blade is soft and will deposit more ink. Choose it for heavily textured fabrics to lay down more ink — which may help with fibrillation — or for use with gels and puffs.
A 60-75 durometer ranks medium on the hardness scale. It’s apt for general printing or for depositing less specialty ink on a design. The hardest option is an 80-durometer blade. It will deposit less ink and is ideal for printing fine detail or four-color process prints.
Composite squeegees consist of multiple blades of varying durometers sandwiched together, such as a 60/90 or a 70/90/70. The benefit is that the harder durometer gives the squeegee great support while the softer edge is ideal for printing.
A great chef preps all ingredients before preparing a delicious meal. Similarly, it’s important that you, as a screen printer, have the essential tools in your arsenal and know how to use them. When you need them, they’ll be readily available and you can get on with production without a hiccup.
 Mesh Count Matters
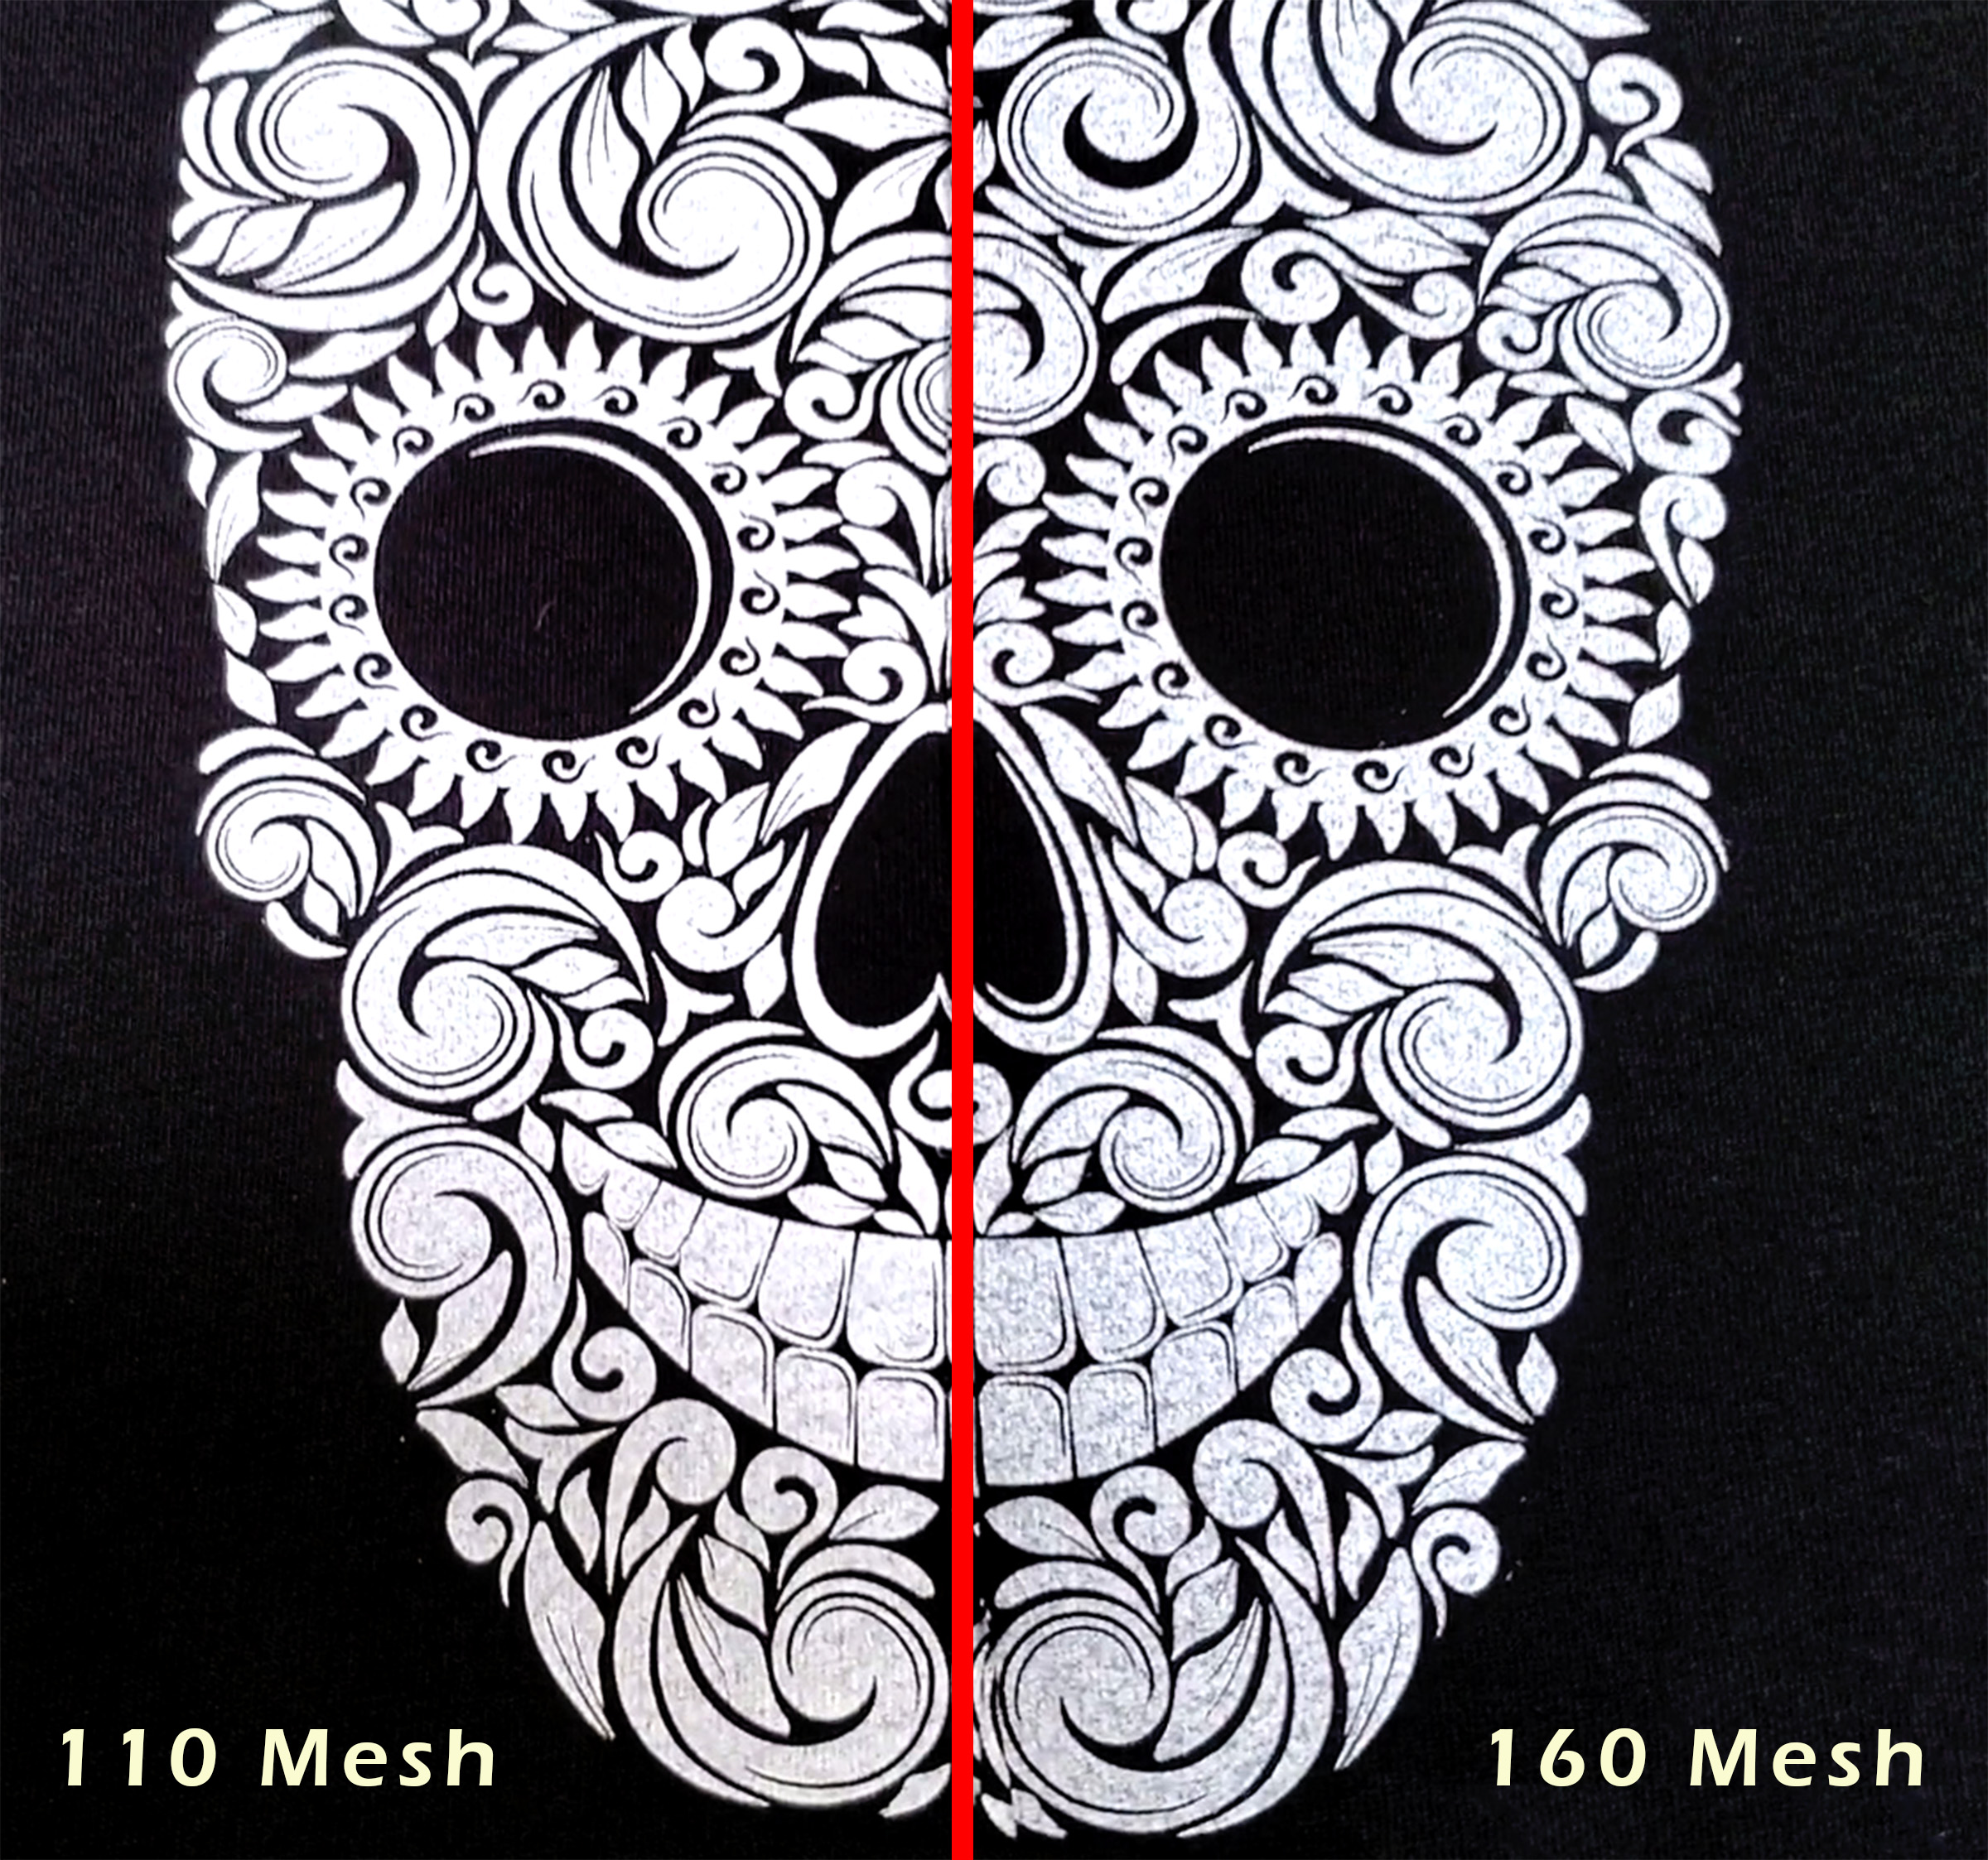
When printing with special-effects inks, mesh count can be a determining factor in a job’s success. The higher the mesh count, the lower the ink deposit will be. Read the manufacturer’s product data sheets for the recommended mesh counts of the special-effects inks you’re using.
Mesh Count Matters
When printing with special-effects inks, mesh count can be a determining factor in a job’s success. The higher the mesh count, the lower the ink deposit will be. Read the manufacturer’s product data sheets for the recommended mesh counts of the special-effects inks you’re using.
- 25, 40 – Glitter inks
- 60, 86 – Specialty inks, such as puff, HD, fine shimmers, glitters or metallics
- 110, 155 – Use where a large ink deposit is needed — such as athletic numbers — or printing white on black fabric, low-detail art or heavy white ink
- 160, 180, 200 – Ideal for printing underbase white to create a softer overall feel. It’s also a good mesh count for medium-detailed artwork. The 200-count mesh can be a happy medium for when a 230 mesh is too fine and a 155 mesh is too coarse.