 Here is part 2 of an article published by Impressions Magazine, in which Kieth Stevens gives us some tips on how to solve common issues that many screen printers encounter.
See Part 1 here
Using Just ONE White Ink
Beginning printers generally start out using just one color for their designs which, in many cases, is a white ink. In regards to white inks, you will need several types if you want to do it right - usually one for cotton, another for low bleed and another for 100% polyester. There are several more you may need, like nylon and such, but the Cotton, Low bleed and Polyester are your 3 main ones.
What if you only want to use one white for everything? In my experience, that would be setting you up for trouble. The cotton white can bleed when printed on a color substrate that has polyester in it. The low bleed and poly white could create a ghost image when used on dyed cotton garments. A low bleed ink may not be strong enough to block dye migration when used on 100% red polyester fabric and the scenarios continue when you start adding even more types of fabrics.
I had a very large customer once that insisted on only having one white ink for everyday use; it was a low bleed white and for the most part it worked great. I had warned the customer that it’s generally not good practice though and may bite them back someday. That day did come! They printed 20,000 reactive dyed cotton shirts that ended up having a ghost image on the back of
every shirt. A ghost image develops when the strong anti-bleed properties of the low bleed ink basically bleaches (for the lack of a better term) the back of the other shirts stacked on top of the print. This doesn’t happen when using a cotton white. Besides, cotton inks are typically cheaper as well.
 Not Trying New Inks and Additives
As with the “one white ink only” scenario, one of the discussion points that frequently comes up in my seminars is why there is not just one line of ink for everything you may need to print. Although that may sound like an ideal, the reality is that people want different types of prints. Some are strictly concerned about opacity; others prefer a matte finish and still others may require more adhesion for - let’s say - Nylon duffle bags. What about those who want a perfect Pantone® color match, while others require a softer feel and so on and so on. Then there is the myriad of substrates, from cotton to nonwoven polypropylene, dyed polyester to stretch swimsuit materials – all requiring different types of inks.
What had originally drawn me away from lithographic (Paper) printing was the fact that silkscreen printing was more of an art form and that there are countless ways and scenarios of getting a certain job done.
So what do I recommend? It’s good to start out with a base ink system that lets you achieve most any look that you may require, but you will need to have some additives at your disposal. With “base ink system” I mean a either a Pantone® mixing system or a ready-for-use line of colors that are readily available in your geographical area.
Once you have your basic line of color inks, consider some additives to round out your arsenal. Why are the additives necessary? Here are a few examples: A glossy ink can be made matte by adding a small amount of dulling additive or what some call a dulling Paste. Texture and dimension can be easily achieved by adding a puff additive that will give you inflated, puffed dimensions. Similarly, to add adhesion to an ink for Nylon garments or duffle bags, you can add some nylon catalyst. (Tip: After it’s cured, wait 24 hours and you should see a great improvement in adhesion).
I can go on and on about what looks can be achieved with a standard ink and additives.
My point is, don’t get caught up in trying to have an ink system that does everything on its own. Expect to need an assortment of additives and other tools at your disposal to achieve the look that your demanding customers are looking for.
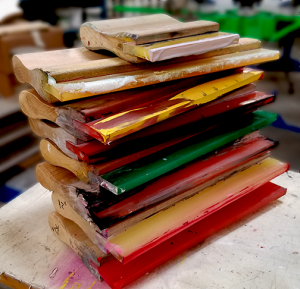 Only Using One Type of Squeegee Hardness
Another misconception I often come across is the belief that printers can get away with just a single durometer squeegee. I’m advocating that printers need at least 3 different squeegee hardnesses for various sized prints as the minimum. Let’s say a few types for the left chest or pocket sized prints, a few more for the children’s shirt sized prints and some for the adult sized prints.
Why invest in several durometer types? Let’s say you only have a 65 durometer squeegee and you need more ink coverage on your print. You would probably need to double stroke the ink to get the amount of ink you require… however, if you were to have a 60 durometer (softer) squeegee on hand, you may achieve the coverage you desire with only a single stroke and thus save time and money. The reverse is also true - if you have too much ink deposit, using a harder 70 durometer squeegee may deposit less ink. You would save time and money not having to spend time trying to adjust the 65 squeegee and try to make it work.
These then are the main mistakes I see new printers make most often in my 40+ years of screen printing. Most importantly, let me reiterate what I stated at the beginning: Ask for help! If you have a print issue but are too stubborn to ask for help, you can just keep going around in circles until you stumble upon a solution or you can simply ask for directions at the beginning and get to where you need to get to much faster, cheaper and with more coin in your pocket.
Read Part 1