Screen Print Precision - Part II
March 01, 2023
In the Part I, I offered advice on the importance of the correct mesh, squeegees, emulsion and inks to get the best out of your screen prints. Each of those basic screen printer’s tools can make or break a screen print shop’s production speed, quality and/or profits.
"To make 'good cookies' it is essential to stop and control the variables, by keeping what works and fixing what doesn't"
I will now delve into the next set of important “tools” or conditions your shop needs to control. When aiming for cookie-cutter precision, if you try and make the same "cookie" but the variables keep changing, then the results will be inconsistent. To make good "cookies" it is essential to stop and control the variables by keeping what works and fixing what doesn’t.
KEEP IT CLEAN
First things first. In the screen/dark room, it is essential to mop the floors and wipe the walls on a regular basis to remove any dust and dirt that may have accumulated. Include any tables, printing surfaces, shelves, etc. as well as the print room floor. Why do I consider this to be important? Granted, many customers may never set foot in your screen/dark room or printing area, but dust and debris can get mixed in the emulsion, screens clog up, and printing machines and dryers can malfunction as a result. I’ve also found that the cleaner the work environment the more products get printed, increasing the profitability the company.
REMOVE MOISTURE
Now that you have a clean screen/dark room you can be proud of, you need to ensure it is a dry. When you coat your screen with direct emulsion and place it in the drying room, emulsion will evaporate the water it contains into the air. If you don’t have a way to remove the added humidity, your screen will not be as dry as they should be (bone-dry). Purchase a dehumidifier - not a heater but a de-humidifier. If you can, pump some of your office air-conditioned air into the screen room. This functions well, because the air has been filtered and conditioned. Be sure the AC has a filter and replace or clean it regularly.
"Purchase a dehumidifier and, if you can, pump some of your office air-conditioned air into the screen room"
A coated screen that is not completely dry before exposure may result in premature screen breakdown during the production run. The film/glass can also stick to the emulsion after exposure and will ruin the film and screen, or worse (such as break the exposure glass). If you are using water-base emulsion and ink, and if the screen isn’t dry all the way through to the center, the water-base ink can eat away (dissolve) the emulsion and cause premature break down.
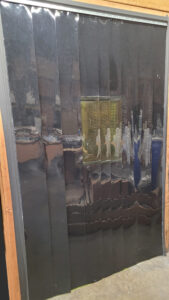
AVOID WHITE LIGHT
In regards to the screen/dark room, white light is a cancer. Any unfiltered light reaching your screen prior to exposure will cause trouble whether you know it or not. To test, take a freshly dried, coated screen and tape a coin on it (in the normal image area). Leave it on top of the drying rack (screens stored underneath another may be in the shadow so they may not get as exposed), then wait a few days or a week in the screen room without interruption. Wash the screen off at the end of the week (without further exposure), and if you notice that the area where the coin was washed off before the rest of the screen, it shows that the emulsion is slowly being exposed in your screen room! Do whatever it takes to make a dark room dark and use lights that filter out - or do not contain - the white light spectrum.
SHIRT SIDE DOWN!
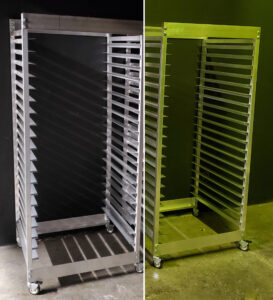
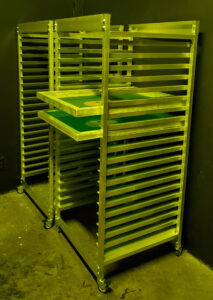
Now your screen/dark room is ready for action. Be sure to get a proper drying rack for your screens. Once you coat your screens evenly with the emulsion, they must be placed on the rack to dry with the SHIRT SIDE DOWN. I can’t tell you how many times I find that a shop’s coating techniques are perfect, only to find that the screens are drying upside down. Don’t mess up this part: DRY THE SCREENS HORIZONTALLY WITH THE SHIRT SIDE DOWN AND THE INK SIDE UP!!!!
FILM QUALITY
In regards to film, Take a look at your imaged film (one with the dark positive image one it) and hold up to the light, preferably sunlight. Check if you can see through the black dark area of your film. If you can, your film is not as dark as it should be. I’m not saying that it doesn’t work, but back in the day when we were using real film and diazo old school emulsions, we had a very large window of exposure time. The film was as black as coal, no light shone through and the emulsion was very slow and forgiving. With today’s quick exposing emulsions you have to be extremely careful not to have any source of light. I even turn off the wash-out booth light to prevent any excess exposure, at least until the image is mostly washed off. Big design areas may not be as much of a problem as fine lines or halftones.
PALLET PREP
If you are using a flash during production, the pallets will heat up from the use of the flash. When starting a fresh run, warm up the pallets by running them a few times under the flash. Keep in mind that shirts may contain extra moisture which the flashes, during printing, can help remove. This process helps with the overall drying process and on cooler days, may help the ink flow better.
One variable that needs to be monitored in the moisture content in the shirt. If, after curing, the ink cracks - even though the drying time and temperature was kept constant - the issue might be excess moisture in the shirt. Humidity in the shop due to the weather, for example, can force the dryer to work harder to compensate. If you break for lunch, continue running the pallets under the flash to maintain the constant pallet temperature, or re-start the process to warm up the pallets when you return.
INK TEMPERATURE
I’ve mentioned various tips in my previous article (Part I) on inks, but wanted to mention some good practice points for storing inks. Just like butter, the colder the temperature, the harder ink becomes. This is true of plastisol in general. I recommend storing ink products in a cool place to make sure it doesn’t get too warm or too hot. I’m not sure if there is a real problem if plastisol gets too cold but there is a very real problem if plastisol inks get too warm.
Heat activates the ingredients in the ink to form strong bonds. At elevated temperatures, the ink can gel or become partially cured. Store inks away from heat sources such as heaters or sunny windows. If you are transporting ink from the store during the summer months, beware of prolonged heat exposure in the vehicle.
KNOWING YOUR “TOOLS”
Now, let’s assume you have made all the right decisions based on what you know for the average job. The job is set up the job and the registration is spot on. The inks seem perfect and the garments are laid out in correct in size and color. Screen mesh selection seems perfect, screen exposure is ideal. The test print comes out good, but….Let’s say you wish the print had a little more of the blue, or the yellow color seems too strong. What can you do at this late stage?
In order to successfully navigate the minute variations of screen printing and stay flexible, you need to intimately know your “tools.” I’m not talking about saws or wrenches, but the basic use of your screen printing tools, such as mesh, squeegee, emulsion, etc. Knowing what each one does and how to adjust the use of one or a variety of these tools is where money is made or lost.
In you wanted to increase a blue ink deposit a bit, you could swap the blade to a softer one. In general a softer squeegee deposits more ink. Similarly, to lessen the yellow ink deposit, try to reduce the squeegee angle, or change the squeegee blade to a harder one. The weight or thickness of your substrate can also affect ink deposit. I have found that a softer, thicker fabric may allow the squeegee to deposit more ink than when the garment is thinner. You may find that these simple and easy squeegee adjustments can make the quickest and most drastic change in ink deposit and opacity.
When someone mentions a flood, it usually has a bad connotation but…Do not underestimate the power of the flood stroke. Some printers think it’s just moving ink around so you don’t run out of ink at a particular design area. But in reality - big secret!! - the flood stroke floods ink into the screen image to prepare the ink for application. Printers in the solvent world would not, and could not, function without the proper flood stroke. The solvent inks would dry out if the screen is not sufficiently coated between strokes. My point is that the print stroke is an inherent part of the “cookie cutter” process.
PRINTING MONEY?
Consider your machine prints money. You want to make sure to keep it running efficiently and at maximum capacity as much as possible. Map out your processes and be prepared for the most common eventualities – things that can be easily replaced such as bulbs for your flash, or squeegee blades.
Be sure to keep new squeegee blades (or other replacement parts) handy in the event you need to switch out to a different durometer blade or if one is cracked, nicked or otherwise damaged. Squeegee blades are relatively cheap, but if you don’t have the right durometer one or a clean one ready, it can negatively impact your profit margins.
HYPOTHETICALLY...
If you are on the press and you need to change a squeegee blade – say for a harder durometer - that would not be the time to stop the press to have to clean a squeegee in the right durometer. Wasting time cleaning a desired squeegee while the press waits is a sign that you are not being as efficient as you could be. What’s the big deal?
On an automatic that could print 500 prints an hour, how long do you want to delay or stop printing for? 5 minutes to clean a squeegee at an easy .50 per print will cost you $20 for the wait. Stop a press 3 times a day, it’s $60 less income per day, times 5 days/week amounts to $300 per week, $1,200 per month, or $14,400(!) per year of lost income. That’s for just 15 avoidable minutes a day that the press didn’t run. You can review many things in your shop to save a minute here and there.
I have a large Koi Pond at home with a very audible waterfall, when I come home or when I let the dogs out in the morning, if I don’t hear that water running, I panic. That is how you should feel when you have the work and you don’t hear the press run. The Koi depend on the waterfall for their lives, and you really depend on that press for your livelihood.

IT’S ALL RELATED
I often like to compare screen printing to the sport of fishing to help people understand that each piece of the process correlates and impacts every other process. Let me illustrate: If you were a fisherman about to set off on a fishing trip, you would research and adapt your tools to whether it’s a lake, river or ocean you’d be fishing in. What types of fish are to be had so you can pack the correct type of reel, the type of line to use, the lures, the bait, and the hooks. You’d check the weather so you’ll pack the appropriate clothing and accessories.
PREPARATION IS KEY
Similarly, setting up a print job, you would need to assess the type of substrate to be printed as well as the type of design. Does it have half-tones or is it solid? Has the customer asked for special effects? With this knowledge, you can choose the ink type depending on the substrate, emulsion type, screen mesh per color/type of ink and squeegees. Once you’ve set up your screens and loaded the pallets, prepare the pallet temperature and run a test print. This will show if any other adjustments need to be made for humidity (excess fabric moisture, weather related moisture). The dryer needs to be set based on fabric, inks (low-cure or standard), and humidity level to fully cure.
MAKE A NOTE
Another aspect to consider, whenever you feel you have knocked a job out of the park, is to write every step you made to achieve that success so you can repeat it. Document any changes made, however subtle, that achieved that "cookie-cutter" job, as well as things you might have done differently. Keep a log book nearby so you can add and refer to for next time. It’s ok to struggle to get somewhere once because you may not know the way, but once you know the route, you should easily find your way again.