Pointers for Prepress Success - Part II
February 15, 2019

Here is the continuation of the article by Kieth Stevens recently published in Impressions Magazine, as to what pre-press steps should be done to ensure print success (read Part I here):

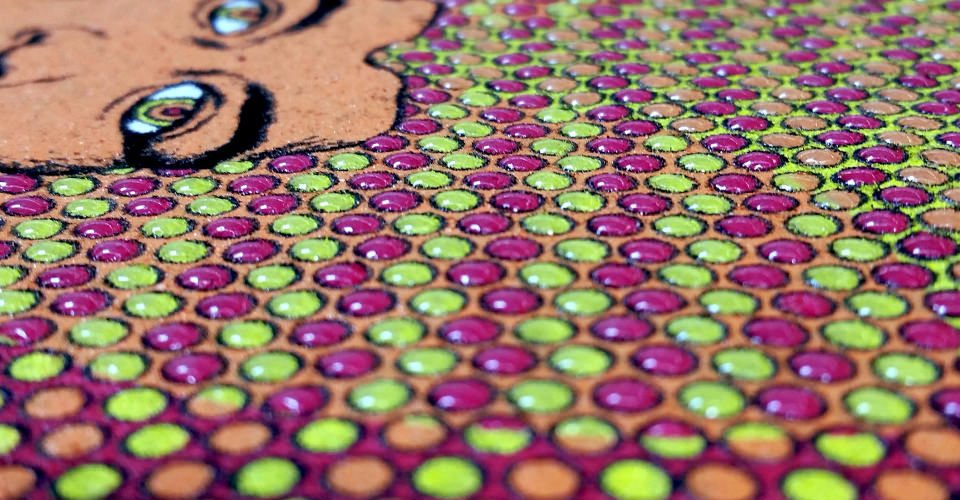
4. Correct Stencil Thickness:
Have you ever felt a screen? Doing so enables you to gauge mesh tightness and emulsion thickness. I do this when I visit shops because it gives me an idea of what type of shop or work I;m encountering.
Why? I can take the same sample gallon of, say, white ink to two shops and get two completely different print results. No two shops are the same, but there should be some similarities.
Are the screen meshes at least in the same ballpark with regard to tightness and is there some type of emulsion gasket? The thicker the emulsion gasket, the thicker the ink deposit. It always amazes me when I see someone start coating screens correctly, only to scrape off all that extra emulsion at the last moment that they so carefully applied. Many screen printers do this to save money - so they think.
When printing the design, they think they need to double pass the squeegee to get some opacity from the ink. However, this extra step potentially could have been avoided id they would have left the emulsion on the screen.
Emulsion easily can regulate the amount of desired ink on a print. If you want a small ink deposit, simply apply a small amount of emulsion on the screen. The thicker the emulsion, the more ink that can be deposited.
However, let's talk about surface area. If you have a very fine dot and are using a 280 mesh, for example, think about that dot's surface area and that of the emulsion. If the dot size's surface area is smaller than that of the emulsion side of that dot, then the deposited ink will try to stay in the screen instead of on the shirt. Also, if your screen isn't as tight as it could be, then the screen mesh's surface area also will hinder the ink deposit.
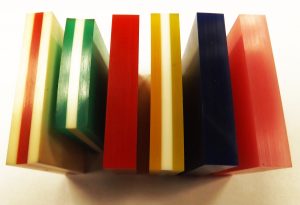
5. Squeegee Maintenance:
Many printers also fail to maintain sharp squeegees, which make applying ink onto a substrate easier and more enjoyable. It also increases print quality.
Imagine the squeegee passing over the image area. A sharp squeegee leaves a small ink film on the screen, which allows the deposited ink to release more easily, thus creating a smoother ink deposit and higher-quality print and feel.
With a dull squeegee, more ink is left on the screen after ink has been applied to the substrate. This ink film can partially hold back the ink being released, which will result in a rougher-feeling print. To compensate and get a smoother print texture, printers can slow down the print stroke and increase pressure. Unfortunately, this also slows production.
6. Pallet Type:
Apart from pallet maintenance, pallet type is an often-overlooked, but important, printing factor. I've noticed over the years that when I printed on T-shirts, then switched to print on a sweat shirt or even a thicker T-shirt style, the designs feel and look improved dramatically. The resulting print on a sweat shirt would be smoother and more opaque. I discovered this was due to the soft layer created by the sweat shirt.
When I was a machine operator, I would notice thin thread or other debris often got stuck on the pallet when printing some type of halftone or four-color process design. Those particles also would show up in the finished design, creating a misprint. The debris would need to be removed before printing can commence.
Some machine manufacturers use a type of heat-resistant rubber material on top of the pallet. This seems to improve the print quality and can help smooth the imperfections caused by lint or other things that can get underneath the fabric.
If your pallet does not have the rubber material built in, you can add a soft rubber pallet sheet. these are available from any print supply store. Remember to ensure they are the heat-resistant type specifically meant for screen printing. Adding the rubber covering can help prevent heat distortion or warping in wood pallets. If you have an aluminum pallet, it will make the pallet easier to handle when using flash.
There are many prepress details that can affect results, but these are the most important factors for ensuring consistent, quality prints.