Download How to Transfer Guide
Printing Plastisol Heat Transfers
Plastisol heat transfers have many advantages and can save time and effort in fulfilling orders or keeping inventory in check. Many print and retail shops are offering “just-in-time” turnarounds on orders, and transfers can help fulfill small or large orders by reducing lead times.
Different sized logos for example can be printed on the same sheet of transfer paper (ganging) and can later be applied to various parts of a garment or item. For example, a larger sized logo can be applied to the back of the shirt whereas the same logo in a smaller size can be applied to the front chest area or even to a baseball cap or a koozie.
Plastisol heat transfers are basically printed using the same printing methods as direct printing, except that the transfer is printed in mirror image unto a transfer paper or film, and the print sequence is backward. The top layer (last printed layer) of a transfer will become the bottom layer when the transfer is applied to a garment.
Hot Peel or Hot Split Transfers
 "Hot peel" or "hot split" refers to transfers made by peeling away the transfer paper immediately after they are applied in the transfer press - or while they are still hot. Both hot peel and hot split are used interchangeably. Hot split transfers split the ink film between the paper and the fabric after heat and pressure are applied. As the paper is peeled from the fabric, some of the ink remains on the transfer paper while the majority melts into the fabric. This splitting of the ink film produces a very soft, breathable print when using standard opacity inks.
Some types of transfer inks melt almost entirely into the fabric and leave very little, if any, residual ink on the paper. The paper and/or the ink used, along with application time, temperature and pressure of the heat seal machine, all govern whether the ink melts entirely into the fabric or not. Hot peel transfers that release almost the entire ink film may not be quite as soft and breathable as hot split transfers. The difference between these products may in fact be too slight to notice in some applications.
A variety of papers and films are recommended for printing hot split or hot peel transfers. These range from non-coated papers to specialty-coated papers and hot peel polyester films. Both types perform well, but the specially coated papers and films are usually more forgiving to the novice transfer printer. The better release of the coated paper, as compared to a non-coated paper, allows for a slight over gelation of the inks.
Gelation is the term used for partial fusing (surface drying) of the inks when printed. Over gelation of the inks, when printing transfers, can cause poor release, spotty transfers, or poor adhesion. To print transfers, inks must be gelled between each color (not printed wet on wet as in direct printing). Gelation temperatures range from 225°F to 275°F (107°C to 135°C) depending on ink film thickness, and the ink being used. Properly gelled ink is dry to the touch and should break apart easily if removed from the paper. If ink is severely under gelled and stored before application, plasticizer (an ingredient in the ink) may exude from the ink and form a clear uneven border around the outside of the print on the paper. If this exudation occurs, it is a sign that the transfer is losing an ingredient needed for proper adhesion and fusing. Adding too much reducer to the transfer ink may exacerbate this problem. The final fusing of a transfer ink occurs when the transfer is applied to the garment.
NOTE: Fusing is the proper term for "drying" plastisol inks. Curing is a generally accepted term when referring to the drying of plastisol inks, but is really what happens to most water or solvent based inks when heated or catalyzed.
 It is important to only use papers designed for transfer printing, because they are usually more temperature stable than conventional bond papers. This is very important when printing hot split, multicolor transfers. Papers tend to shrink when heat is applied to them. Since hot split transfers need to be butt registered (colors touch or almost touch each other but do not overlap), too much shrinkage will lead to poor registration. Poor registration, in turn, leads to noticeable gaps between colors in hot split transfers, or muddy looking colors where colors overlap. The use of hot peel polyester films is especially recommended when creating multi-colored transfers. The film tends to be more stable than paper when multiple dryer runs are needed, thus allowing for more precise registration of the print.
It is important to preheat transfer paper or polyester film before printing multicolor transfers and to keep the paper warm between colors until the job is finished. Many printers use hot boxes - a cabinet that is heated to 120°F to 130°F (49°C to 54°C), to store printed paper overnight or between colors.
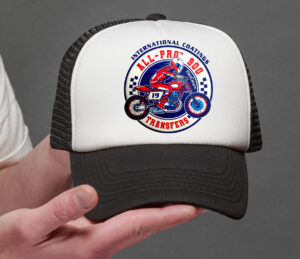
Hot split or hot peel inks are plastisol inks that have a lower melt point than standard plastisol inks. The lower melt point allows the inks to release or split quickly from the paper and to penetrate into the garment. This gives the inks a very soft hand and excellent durability. International Coatings’ All-Pro™ 900 Series is a perfect choice for transfers. Use the All-Pro™ 9000 Series when PMS matching is needed. Printers love the ease of use and durable results they achieve using the All-Pro™ series.
It’s easy to incorporate sparkle to your transfers by adding a layer of metallic, glitter or shimmer inks. Just keep in mind that metallic / glitter / shimmer inks contain reflecting particles that may bounce the heat off the print, so you may have to adjust your temperature or dwell time to get the right gelling temperature.
We also offer an additive, Quick Trans 500, which can be added to the 700 Direct Print Series inks to convert them to hot split transfer inks. The mixed inks will work on non-coated or specially coated transfer papers and films. Simply add 20-25% of the additive to the ink. For light colored fabrics, mixed Quick Trans 500 inks should be printed through a 110 to 305 monofilament screen mesh. To achieve a more opaque color, use the 500 additive with HP (High Pigment) colors printed through 60 to 86 monofilament screen mesh. The screen mesh selected should be based on the detail of the design being printed and the type (T-shirt, or sweatshirt) and color of fabric to which the transfer is being applied. Use a 60 to 70 durometer squeegee (hardness of squeegee blade) with a sharp edge. The ink deposit should be about 3 to 4 mils (ink film thickness after gelling) for light colored fabrics. For darker fabrics, a 6 to 10 mil film thickness is necessary.
Transfer application times for both coated and non-coated papers will range from 5 – 10 seconds with medium pressure (40 lbs on most air operated transfer machines) at 375°F to 400°F (191°C to 204°C). Peel transfer hot. Correctly calibrated transfer machines are an important part of the transfer process. If transfers do not apply properly, don't forget to check the transfer machine, as well as your printing and transferring procedures.
Note: Use hot or cold peel paper/film with shimmer/metallic inks. For best results use a substrate with a semi-gloss coating. A matt finish can be achieved as well with shimmer/metallic inks on a matt hot or cold peel paper/film. Use a gloss or semi-gloss coated cold peel paper/film for glitter to achieve maximum refraction.
Puff Hot Peel Transfers
Puff creates a great 3-dimensional or textural effect to a transfer design. A hot peel paper or film will be needed for a puff transfer to create maximum loft. Pre heat/pre shrink paper or film at 180°F – 225°F (82°C – 107°C) 30 – 45 second dryer dwell time before print production. Add International Coatings' 220 Puff Additive to International Coatings All-Pro™ 900, All-Pro™ 9000 or 700 Direct Print Series plastisol Inks to achieve loft and dimension in your transfer once it is applied to a garment.
Mix 10%-15% by weight of the additive in to ink and mix thoroughly. Use 60 – 110 monofilament screen mesh with a 60 – 75 durometer squeegee. The gelation temperatures are very important when printing these puff inks. Gel inks at 180°F – 225°F (82°C – 107°C) 30 – 45 second dryer dwell time. The key to printing a puff transfer is to make sure you gel the ink properly. You want a consistent gel while not activating the puff agent. Take time to dial in your dryer settings.
Next, is the printable adhesive. Use International Coatings 3893 Transfer Adhesive through an 86 monofilament screen mesh with a 60 – 75 durometer squeegee. Gel 3893 Transfer Adhesive at 180°F – 225°F (82°C – 107°C) 30 – 45 second dryer dwell. It’s important to keep the temperature at or around the same temperature as the ink with the 220 Puff Additive in it. If you raise the temperature too much, the puff agent might activate in the dryer tunnel. This may result in poor loft in the transfer image on the garment once applied with a heat press.
Always preheat garment before applying transfer. Heat press application settings: 325°F – 350°F, 30 psi – 40 psi, 6 to 10 seconds, hot peel.
NOTE: Preheat substrate before applying transfer. If the transfer does not puff properly, it is usually because of over gelation or moisture in the garment.
Cold Peel Transfers
International Coatings 700 Direct Print Plastisol inks can be used to make cold peel transfers. The inks should be printed straight from the container on a coated, cold peel release paper. Parchment paper can also be used, especially where it might be helpful to see through the paper. Parchment paper is best suited for one-color transfers since it shrinks considerably when heated. When ordering paper for cold peel transfers, make sure to specify cold peel application.
Inks can be printed through a 61 to 160 monofilament screen mesh. The screen mesh used will depend on design detail and the ink being used. Glitter inks should be printed through 16T to 25T monofilament mesh for best results. The gelation temperature for the 700 Series inks is 225°F to 275°F (107°C to 135°C). Use a 60 to 70 durometer squeegee with a sharp to rounded edge. The squeegee edge used will depend on the ink being printed, detail of the design and ink deposit required. Colors for cold peel transfers can be overlapped, because the ink is not split when applied. Elongation (stretch) may result from over gelation of the inks.
Adhesive powders, such as International Coatings 304 powder adhesive, can be sprinkled on wet ink and gelled for better adhesion to problem fabrics such as polyester. Make sure to brush off excess adhesive from the gelled transfer to prevent adhesive spotting on dark fabrics. Quick Trans 500 additive can be added to the cold peel inks to give a little better release and a softer hand. Add about 12%-14% of the Quick Trans 500 additive to the ink.
Completed transfers are applied at 280°F to 350°F (163°C to 191°C)* for 8 – 12 seconds, medium pressure. Cold peel transfers, when made correctly, can be very durable. If they are not, it is usually due to over gelation or poor application procedures. Since the entire ink film is removed from the cold peel transfer when applied, they are not as breathable and soft as most hot peel hot split transfers.
*Temperature setting depends on the type of adhesive used. Please follow manufacturer suggested temperatures for the one you are using.
Foil Transfers
3801 Foil Adhesive is a plastisol foil adhesive and is used for foil applications on cotton, cotton/polyester blends and 100% polyester fabrics. It is important to test adhesion and durability of this product for your specific application before beginning a production run. This adhesive can also be directly printed to the garment for foil applications.
To create foil transfers, first print – in mirror image - the 3801 Foil Adhesive on cold peel paper or film with a smooth release coating. Use 60 to 110 t/in monofilament screen mesh and a 65 to 70 durometer squeegee. Gel the adhesive at 240°F to 260°F (115°C to 127°C) for 30 - 45 seconds in the dryer.
The second step to creating a foil effect is as follows: Place the garment on the lower platen of the heat press and pre-heat it for 3 – 5 seconds. Place foil adhesive transfer on the garment in the desired location and fuse it at 325°F-350°F (163°C to 178°C) for 8 – 10 seconds at 40 psi. Next, place the cut piece of foil you are going to apply over the transferred foil adhesive graphic and heat press it at 325°F-350°F (163°C to 178°C) for 10 – 15 seconds at 40 – 60 psi. Let foil cool down and then peel cold.
NOTE: For greater durability, garments with applied foil transfers should be hand or machined washed (delicate cycle) inside out and line or air-dried.