Can Emulsion Coverage Indicate Print Quality?
May 26, 2021
This article was recently published on Impressions' website.
One of the top complaints I have heard in my career is that textile inks, whites in particular, are not opaque enough. Whenever I receive a “complaint,” I try to ascertain which product was used and the steps they took to print it. Better yet, I ask for them to send me a photo of the issue they are complaining about. A picture really is worth more than a thousand words in quickly assessing a problem.
Rarely do I find that it’s the actual ink that is causing the problem. Most commonly, it boils down to printing technique or lack thereof. In many cases, upon studying the image sent to me, I notice that the print quality is not as good as it could be. It displays rather ragged or uneven edges, indicative of poor emulsion coverage.
In my years of visiting shops, I’ve found that the top most overlooked aspects of a screen printing shop is the condition of the emulsion on their screens. One of the first things I like to check when entering a shop are the screens that have been prepared for sample printing or production. Sometimes all I need to do is just touch them as I pass by on a tour, but other times if the customer is really open for my opinion, I will hold a screen up to the light to see its quality. You may be surprised how quickly you can ascertain the quality of the screens in just a few seconds.
Believe it or not, the condition of the screens can really contribute to the quality of the shop’s prints. There is an absolute correlation between the quality of a print and the tools that the printer is using. Here is how emulsion coverage will make a difference:
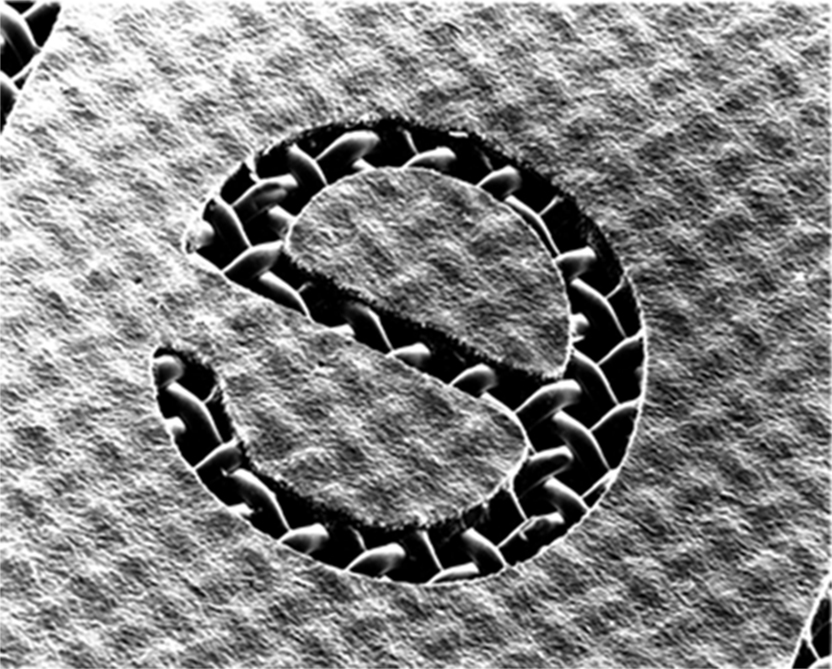
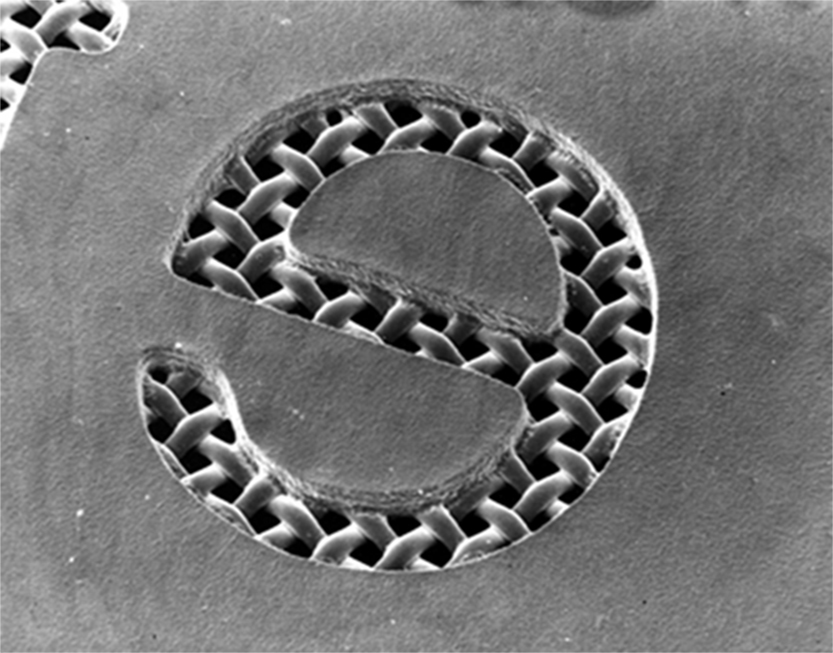
Emulsion over mesh (EOM) is the emulsion thickness of the coated screen vs. the uncoated screen. A typical average percentage of EOM is 20%. It’s important to have a thicker emulsion deposit on the bottom of the screen’s shirt side. When using finer mesh counts, less emulsion typically is applied, but it is still important to have more emulsion applied to the bottom of the screen. Always keep in mind that just as the mesh controls the flow of ink, it also controls the flow of emulsion.
This is crucial because extra emulsion acts like a gasket to hold back the ink that is being squeezed through the screen under pressure. Otherwise, the ink can go anywhere, even under the gaps of the screen weave. The resulting print can have ragged or uneven edges due to ink gain, such as I’ve seen in most of the pictures sent to me. Having a properly thick and even emulsion stencil also helps eliminate mesh marks while increasing opacity.
Please note that certain special effects inks may also require a much thicker emulsion coating than regular inks, such as for shimmer or glitter inks. Certain texturing inks such as puff, gels, or high density inks may also require thick coats.
Let’s assume that all the emulsions out there are of high quality. With that said, there are 3 types of emulsion that are readily available to today’s printers. First there is Diazo, the least expensive but also the least sensitive to light thus requiring a longer exposure time. Diazo can be obtained as solvent-resistant or water-resistant emulsions but most printers use the water-resistant Diazo for water base inks. Diazo emulsions are the most forgiving in regards to unintended exposure to light.
Pure photopolymer emulsions, also known as “one-pot” emulsions, are a high-cost alternative to Diazo. Photopolymer responds to very quick exposure, has a longer shelf life and is good for most inks other than water-based. Utmost care should be taken to process and store this type of emulsion. Unintended exposure to any light can greatly affect the resulting image.
Thirdly, there is a hybrid emulsion consisting of both, Diazo and Photopolymer, termed Dual Cure. The Dual Cure is at a medium price point and has a good exposure time with a moderate amount of resistance to water-based inks.
All emulsions have a published “solids content.” It basically measures what percentage of solids are left of the emulsion on the screen after the emulsion has been applied, after the moisture has been removed by properly drying the screen and before exposure. The higher solids content, the better.
Now that I’ve expounded on the basics of emulsion, let’s move to what I really wanted to get at: The consistency of the emulsion thickness. To make my point easier to understand, think of emulsion as a gasket or seal. Without this proper gasket, straight edges of the design can look like stairs or zig zags, half tone dots can end up looking like stars and you will see a tremendous amount of dot gain (dots touching or running together). This is due to the interaction of the threads and the image. By having enough emulsion on the substrate (shirt side) of the screen, it raises the threads up and out of the way and then only the image (stencil burned on the screen) is interacting with the shirt. You only see what was on the film positive. The screen mesh thus is only carrying the emulsion and metering the ink flow. As far as the image, the emulsion is doing all the work.
Emulsion manufacturers use a tool to measure the exact emulsion thickness and also can provide charts to show what the optimum amount of emulsion for each mesh should be. Having enough emulsion on the screen is imperative. This is not a tool to skimp on in an attempt to cut costs.
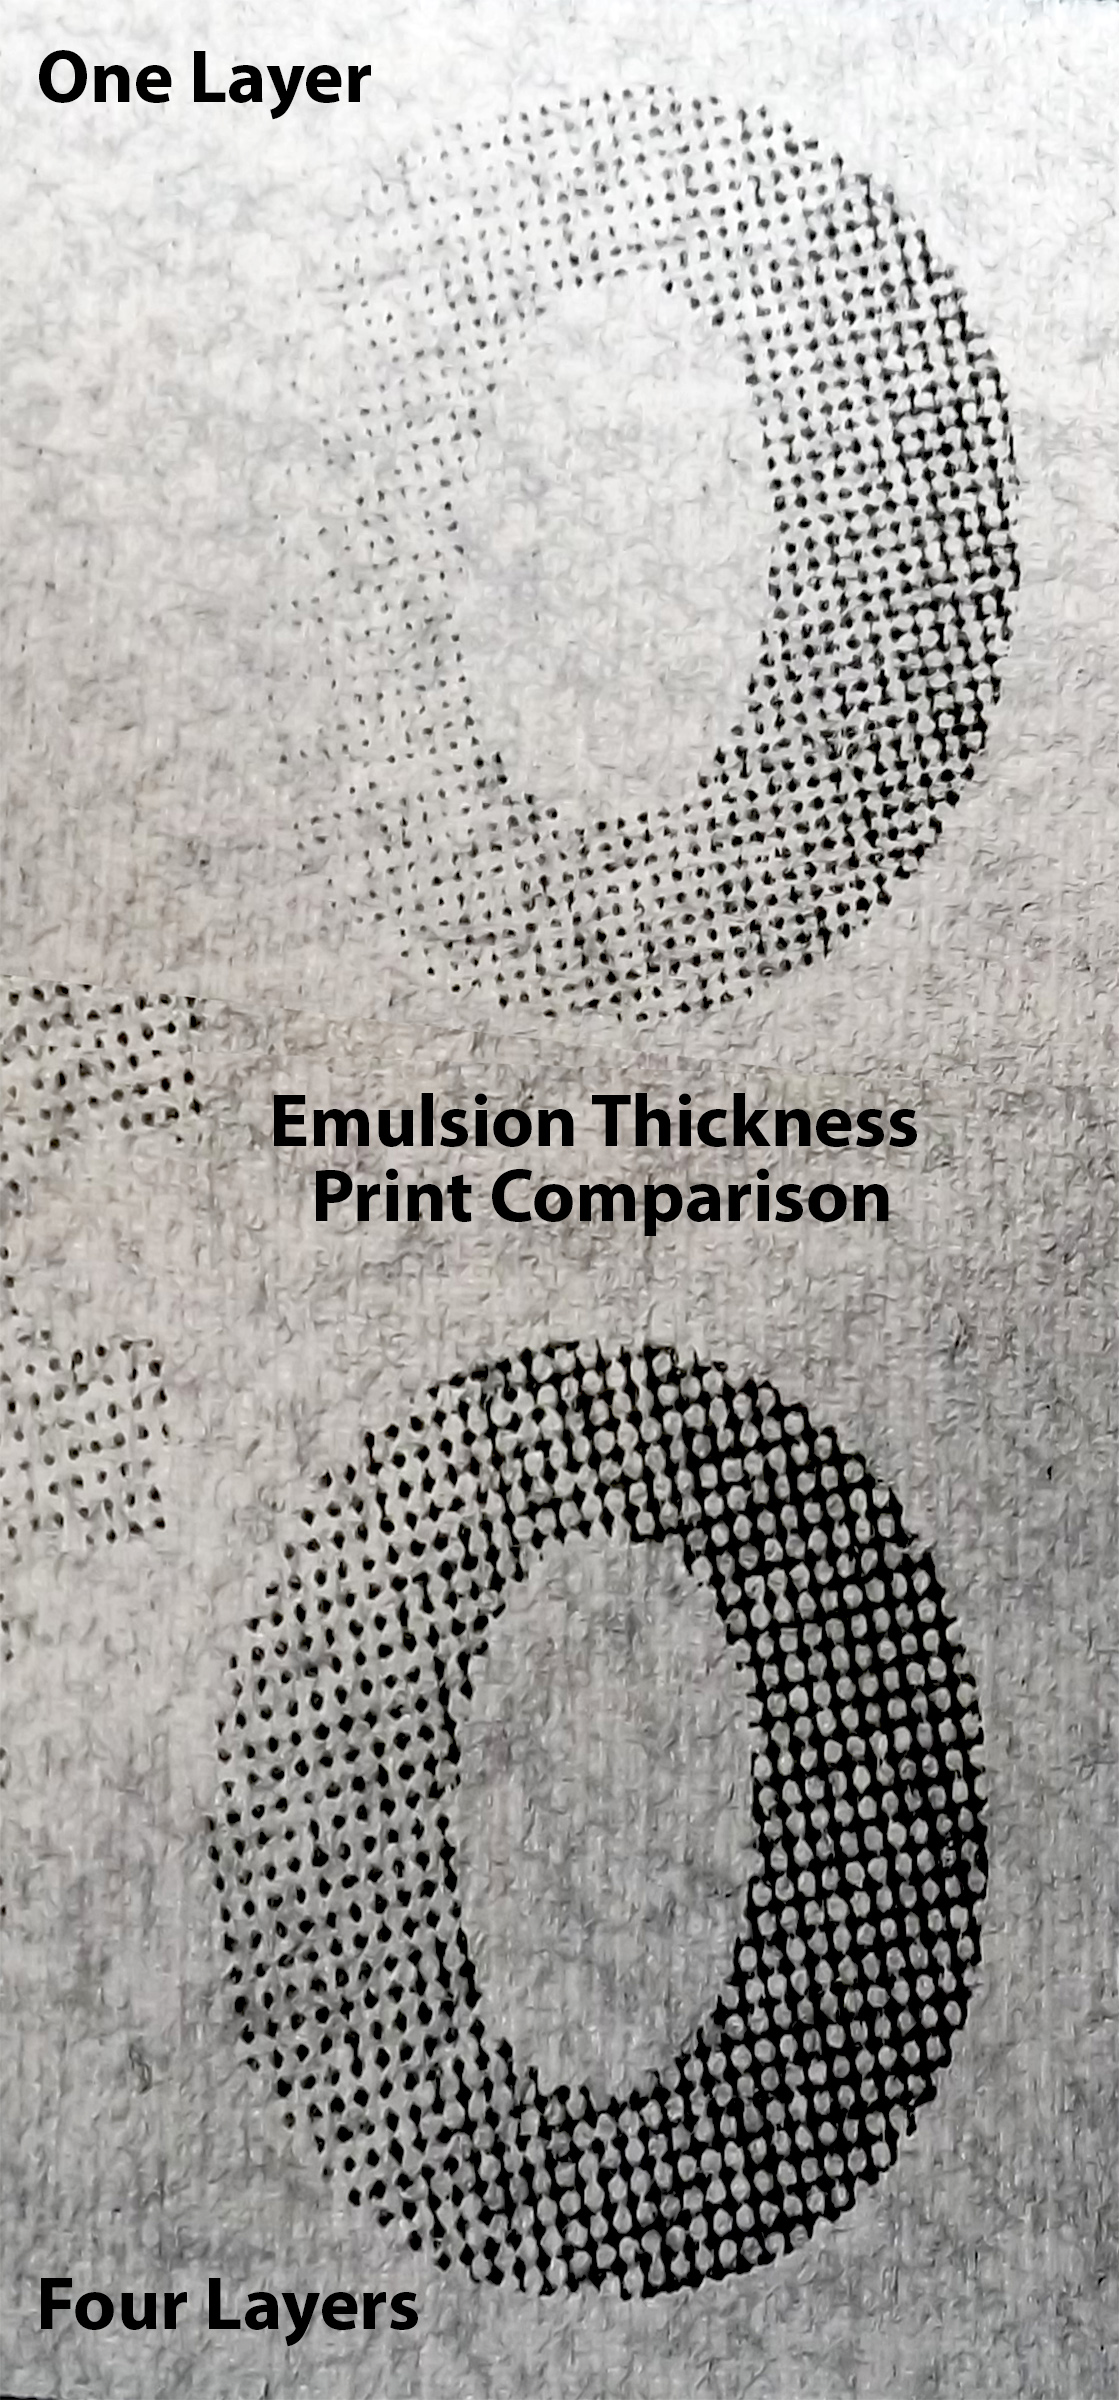
Feel the thickness on the underside of the screen where the image is; it should be thicker on an open mesh and thinner on a fine mesh. In any case, there should be something substantial to feel. If the edge of the emulsion is not distinct, chances are that there is not enough emulsion on the screen and pinholes or premature emulsion breakdown may be taking place.
One of the most fascinating things I often see when I visit a print shop is what I lightheartedly refer to as the “Picasso Syndrome.” What I mean by that is that I observe one of the shop employees in the screen room spending way too much time touching up the screen by using a backlight so they can see pinholes that have developed on the screen. Granted, a number of factors could have contributed to this syndrome, such as the glass or film being dirty or the screens being under exposed, or the possibility that the screen could also not have been properly degreased. However, the most likely culprit to the Picasso Syndrome is that the screen may not have enough emulsion covering it.
One more thing I must stress: I often hear a customer state that they are unable to get a good image on the screen even though they have tried everything in regards to the emulsion, but still have difficulty in developing the screens. Here are a couple of things to check:
– Is your film positive opaque enough? Now that film positives are often being printed on ink jet printers, opacity is often not as good. In the past we used film made in a dark room and they were completely opaque, so exposing was much more forgiving. Today’s methods are much more convenient, but we need to make sure the film we use are as opaque as possible in order to create a great image.
– Secondly, make sure your emulsion – either wet in the bucket or dry on the screen – is being stored in as dark a place as possible. Remember that even though you have exposed the screen it is still light sensitive until you have washed out the image.
This article is by no means a complete list of screen room issues that may affect your print quality, but lack of emulsion coverage is a common culprit.
Check out our How-to emulsion video for step-by-step tips.
[embed]https://www.youtube.com/watch?v=X5n-yuLVp1U[/embed]
Kieth Stevens is the Western regional sales manager for International Coatings. He has been screen printing for more than 44 years and teaching screen printing for more than 14 years, is a regular contributor to International Coatings’ blogs and won SGIA’s 2014 Golden Image Award. He can be reached at kstevens@iccink.com.
